 Just a few days ago, I published a post about my family’s new Home Theater PC. That post focussed on the hardware I used to put together the machine. Today I’ll discuss the software.
First and foremost is Windows 7. I use Windows Media Center (WMC) as my DVR software, and WMC is built into most versions of Windows 7, and has been in Windows since the latter days of XP. WMC is a great DVR package that works very well. I’ve read articles that put it on par with Tivo for the best DVR interfaces. I think that’s not an exaggeration, it is a good interface. This isn’t meant to be a detailed “how-to”, but rather will describe how I went about setting up my system. I tend to learn best by doing, and don’t read through manuals before I start, so this is meant to help give pointers on things that aren’t obvious to a first-time user. It’s also meant to give an idea how easy (or hard, depending on your perspective) WMC is to configure and use.
Setting Up Your TV Signal
Since I use an HDHomeRun as my tuner, which interfaces with the computer via the network, the first thing to do was to install the drivers and software for it. This configures Windows to recognize the tuner, and lets you do your initial channel scans. The process of getting channels set up right took some figuring out on my part. I had never used WMC, and didn’t realize the functionality it really has, which came in handy once I did get it figured out. One thing I found very helpful is that the HDHomeRun setup software gives you a screen with a grid layout that shows all of the channels that it found by number, but also shows the label as well (like KARE-HD, which is channel 11.1 in the Twin Cities and is our NBC affiliate.) This was very useful later as I set up WMC.
Once you get the channels scanned and recognized in the HDHomeRun software, you should be able to proceed on to WMC. When you first load it up, it will ask you to go through a setup process. Once you get to the TV portion, it should recognize that you have a tuner (or tuners, depending on your setup). The setup is fairly easy to get through. It’s the post-setup configuration that takes some work.
Once the setup is finished, you’ll be presented with the main menu in WMC. You’ll want to check the guide against what the HDHomeRun setup screen said you have as available channels. I had about a dozen channels missing from my WMC guide.
I should stop to explain a little quirk in the channel lineup. I use the wire from my cable company as an antenna, which comes into my home for internet and phone service. The local channels are all there, in full HD. This is a requirement that the FCC places on them. However, there is no requirement that the channels be located where you expect them. Most of my channels are in the 70’s range. This isn’t a problem once you understand what’s going on, WMC will let you give any channel any number you want, so changing it to what you’re used to is pretty simple.
The first thing you’ll do is head into the settings to get the channels set up the way you want. Go to ‘Tasks > Settings > TV > Guide > Add Missing Channels’ first. You’ll want to add all the channels that you didn’t see in your guide that should be there. Just go to ‘Add QAM Channel’ and add the first one. Put in the number that you saw in the HDHomeRun setup (even if it’s weird, my 11.1 shows up as 75.2, so enter 75.2), click ‘Next’, the next screen will ask you to enter the modulation. Every channel I have is “QAM 64”, which is the default. Click ‘Next’ again. Now name the channel. This isn’t overly important, but it’s best to give it the same name that the HDHomeRun software gave you. Repeat this until you have all of your missing channels entered.
Next you’ll need to edit the channels. If they are already in your guide and everything looks good, you can leave them alone. If you had to add the channel, you’ll need to make some changes. First of all, select the channel you want to edit. Then you should be given a chance to change the number. This is where you can change it to whatever you want it to be. Making it what it is normally in your area makes the most sense, but isn’t necessary. Next, you can select “Edit Source.” Here, if you have more than one tuner, you can set the tuner priority. I have four total tuners, and one of them doesn’t work great. It’s a good backup if nothing else is available, but not a good tuner for everyday recording. I put it at the bottom of the priority list. Next I go to “Edit Listing”. This is where you set your guide data. It’s very simple, just click on “Edit Listing” and find the channel in the list. The easiest way to do so is to start typing. If you are setting a local channel, type in the call letters (WCCO, KSTP, KARE, etc.). If you happen to be adding cable channels, start typing the network name (A & E, etc.) My system gives me 668 choices, so scrolling is an involved process. Once you set this, WMC knows what guide listing to attach to the channel.
Once your number is right, you have your tuner priority set the way you want it, and your guide data is configured, you should be set. Back out of the menus, saving everything along the way. Now you can start setting up recordings.
Expanding Beyond Windows Media Center
 Windows Media Center is a great program that can easily be all you’ll need to enjoy your system, but since you have a full-fledged computer hooked up to your TV, why not utilize it and get the most out of your hardware?
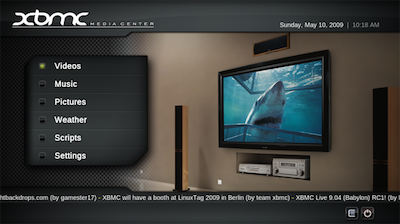
The first program I recommend installing to expand your system is XBMC. XBMC originally stood for “XBox Media Center”, and was a media interface that was meant to be installed on hacked XBoxes. With it, you could listen to music, view pictures, and watch videos, along with other functionality. Today, XBMC doesn’t stand for anything, since the original XBOX is obsolete and no longer in widespread use. It has been moved over to run on Windows, OS X, Linux, and even the first generation Apple TV. It does everything it did on the XBOX, and more. You can now add extenders on it that will let you do all kinds of things.
One thing we’ve always used XBMC for, along with another program that forked off of it called Boxee (which I’ll talk about shortly) is watch videos downloaded from the internet. We have family friends who are German, and they have given us the keys to their account on a site that works like an online DVR (save.tv in case you’re interested.) We set up recordings for all of our kids’ favorite shows, and they watch 90% of their TV in German. After almost 2 years, our five year old is quite fluent in German. XBMC allows us to easily stream the .avi files from a shared drive on the home network.
Another excellent extender for XBMC is a launcher. It will launch other programs from within XBMC, meaning you can do it with the remote control, rather than the keyboard/mouse. An excellent application for this is video game emulators, which is one of the intended uses. We set up Nintendo, Super-Nintendo, N64, and Sega Genesis emulators, which work great. I use an XBox 360 wireless controller that is sold for the PC, so it has a USB dongle that interfaces with the computer. All of the emulators I’ve tried will recognize it and let you set up the buttons however you like for your games.
I mentioned Boxee. I love Boxee, but sadly I have a hard time recommending it. I first started using it several years ago when it first came out. It, and XBMC, were available to be installed on a first-generation Apple TV with a patch that you install via the USB port with a thumb drive. It added excellent functionality to the ATV. It also became available on Windows, OS X, and Linux. They even started selling their own set-top boxes running Boxee software, as well as a remote control for PC users, complete with a full keyboard on the back of the remote for easy searches. The reason I can’t recommend it any longer is that they discontinued support for all versions except their set-top box. You can still find it online if you look, but you’ll never get software upgrades. That means no more bug fixes or security patches either.
There are menu extensions available for WMC to add both Boxee and XBMC to your menu, making them very easy to use in your HTPC setup. When you select them in the menu, WMC closes and XBMC or Boxee opens. When you close out of XBMC or Boxee, WMC automatically reopens – very nice!
Of course another must-install on your HTPC is your browser of choice. I use Chrome, but you should install Firefox, Opera, Safari, or whatever you like. There are a lot of places to find great video on the web that don’t have any way of being viewed but a browser. (I like R.C. Sproul’s videos, some of which are free to watch at Ligonier.) Not to mention quick lookups or couch-surfing, if that’s your thing.
That’s my HTPC. If you have any questions about setting one up yourself, or my experience with using this one, feel free to email, or leave a comment if you see this before the comments close. If I know the answer, I’ll try to help. If I don’t, I’ll point you to Google.